Technical Support
How to setup email account in Thunderbird
-
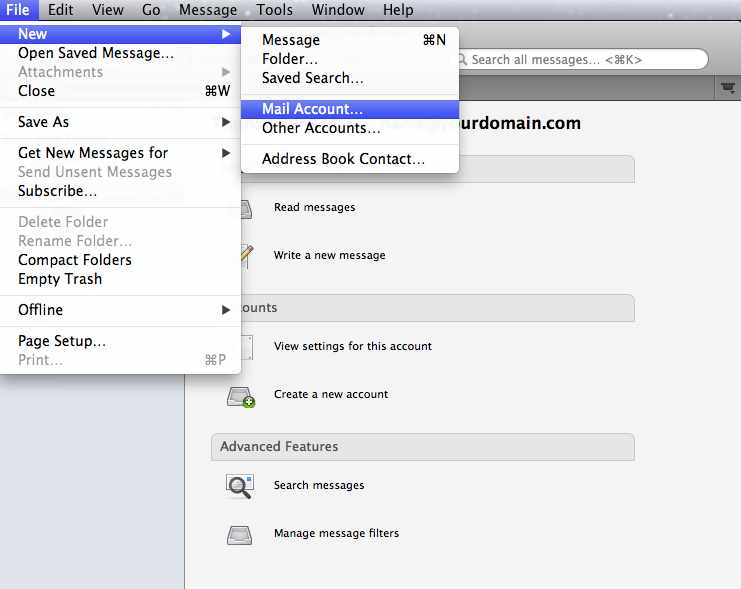
1. Open your Thunderbird application, click "File", then "New", click "Mail Account"
-
2. A new "Mail Account Setup" window pop up as below, enter all the required fields, and click "Continue"

Your Name: Your Display Name
Email address: Your email address, eg alex@yourdomain.com
Password: Your account password -
3. Click the "Stop" button while the system looking for your settings.
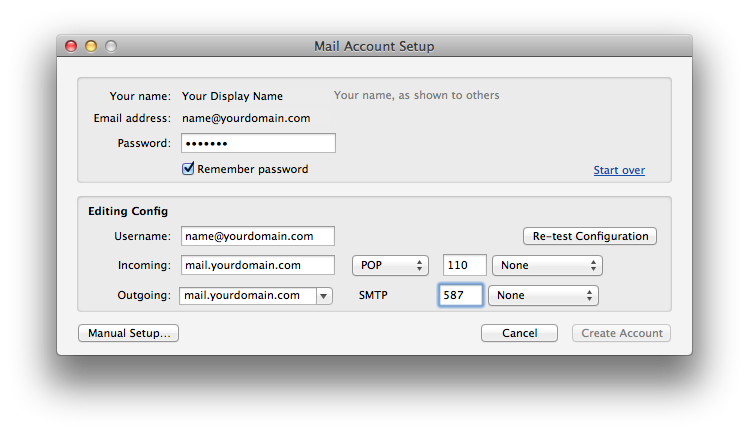
Then manually enter the fields as below:
Username: Your full email address (eg. alex@yourdomain.com)
Incoming: Your incoming mail server (eg. mail.yourdomain.com), then POP, 110, and None for secure connection
Outgoing: Your outgoing mail server (eg. mail.yourdomain.com), then SMTP, 587, and None for secure connectionThen click "Manual Setup..." to continue
-
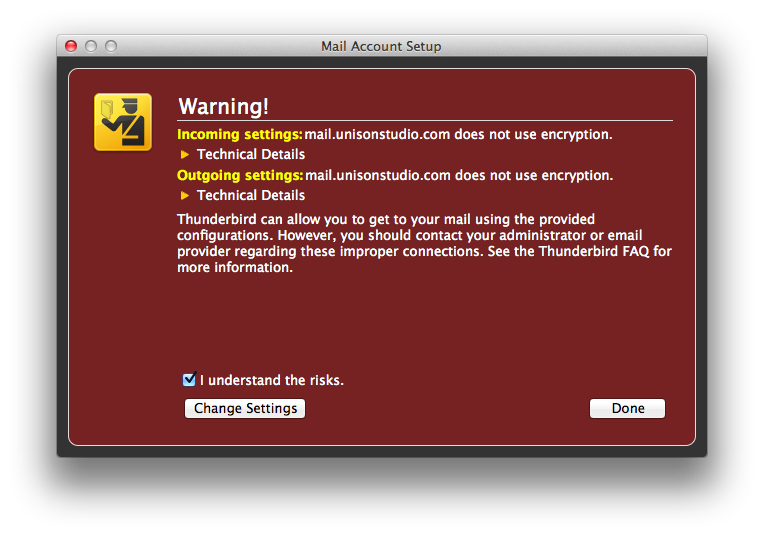
4. During the setup, a warning such as below might appear, tick "I understand the risks" and click "Done"
-
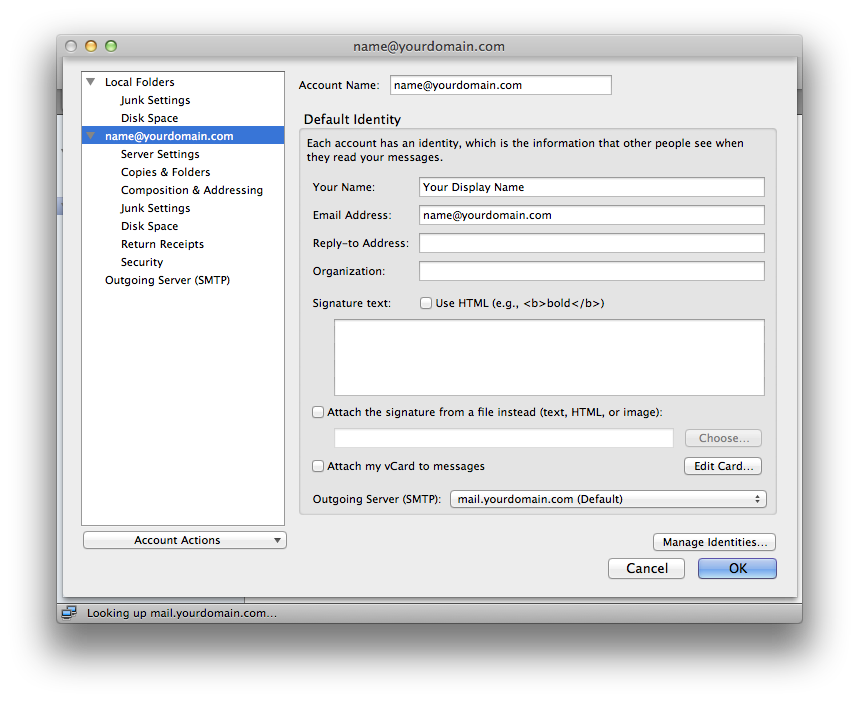
5. A summary of settings window pop up, enter your optional fields, such as "Reply-to address", "Organization", "Signature Text", etc.
-
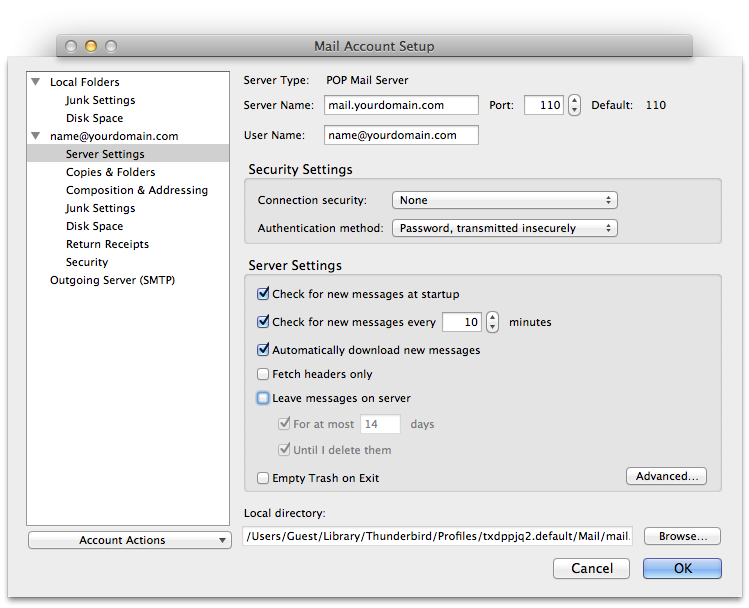
6. Click on the "Server Settings", make sure "Server Name" is "mail.yourdomain.com", "Port" is 110, "User Name" is your full email address. If you choose to "Leave messages on server", we would advise to choose at most 7 days to minimize the risk of overusage of disk space.
-
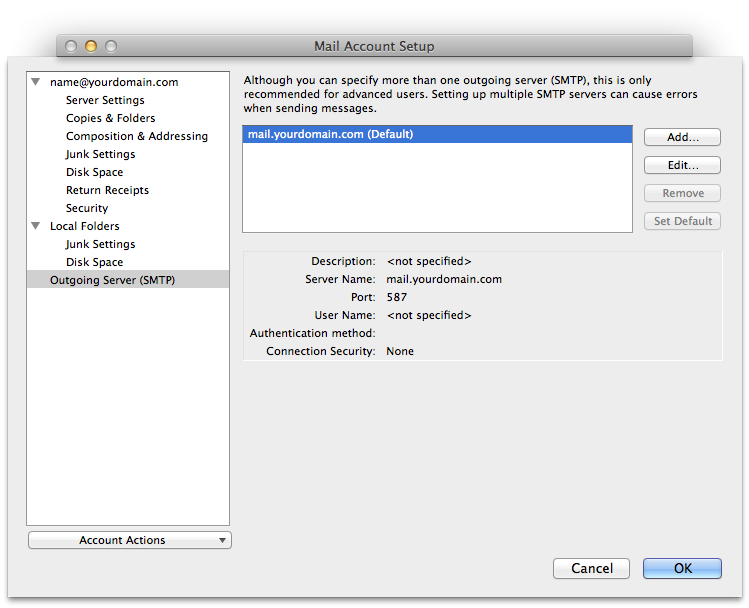
7. Lastly, click "Outgoing Server (SMTP)" tab to configure the outgoing mail server. Select the "Outgoing server" (eg. mail.yourdomain.com) and Click "Edit"
-
8. Enter all the fields required.
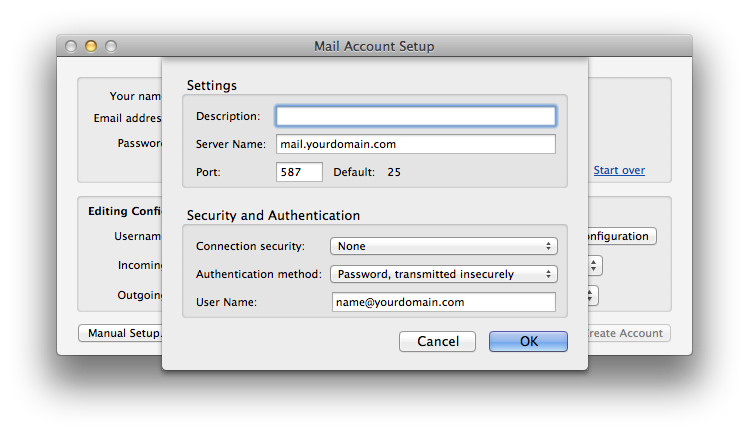
Description: A simple text description of this particular outgoing mail server setting
Server Name: Your outgoing mail server name (eg. mail.yourdomain.com)
Port: 587
Under Security and Authentication, make sure Connection security is "None", Authentication method is "Password, transmitted insecurely", and enter User Name: "Your Full Email Address" (eg. alex@yourdomain.com)Click "OK" to continue
-
9. Click "OK" to finish, and now you are now ready to use your Thunderbird as your email client.