Technical Support
How to setup email account in Apple Mail
-
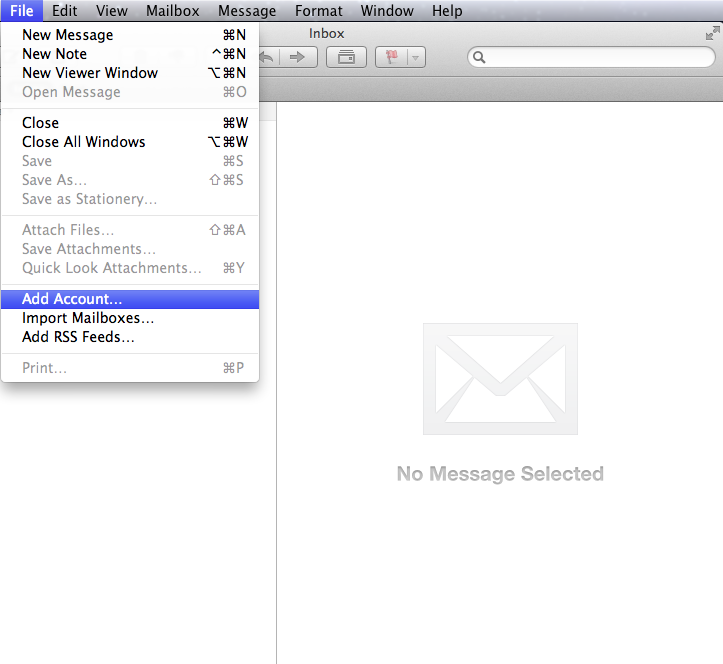
1. Open your Apple Mail, click "File", then "Add Account"
-
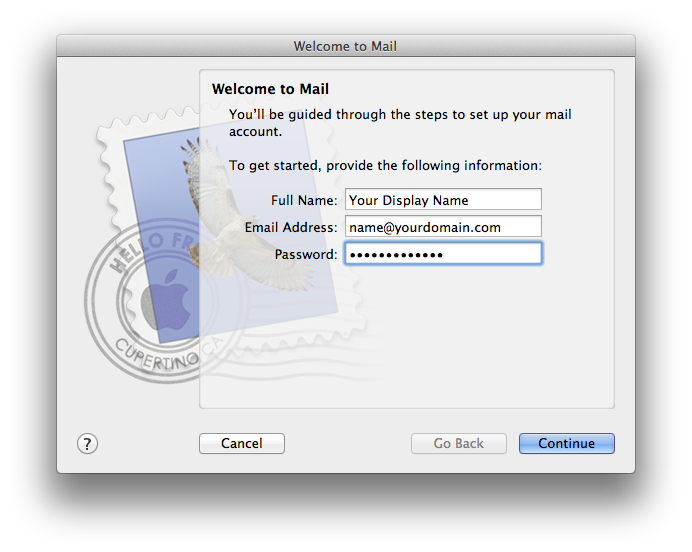
2. A "Welcome to Mail" window pop up as below, enter Your Name (Your Display Name), E-mail Address (eg, alex@yourdomain.com), and Password, then click "Continue"
-
3. Enter the "Incoming Mail Server" information, then click "Continue"
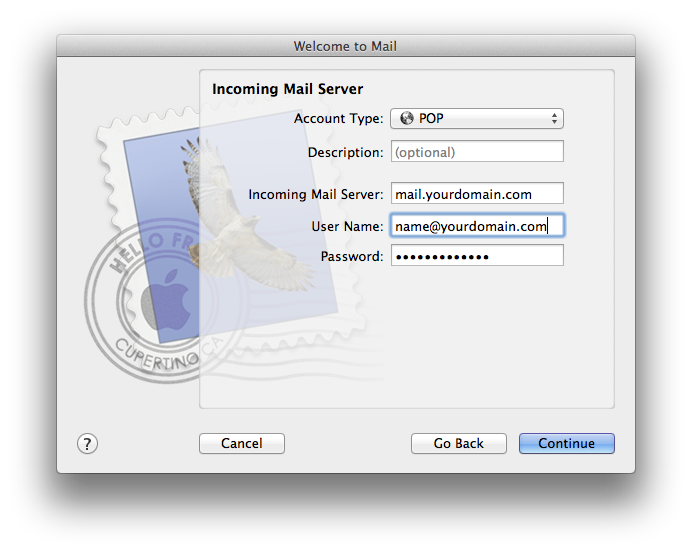
Account Type: POP
Incoming Mail Server: mail.yourdomain.com
User Name: Your Full Email Address (eg, alex@yourdomain.com)
Password: Your Email Password -
4. A warning such as below might appear, click "Connect"
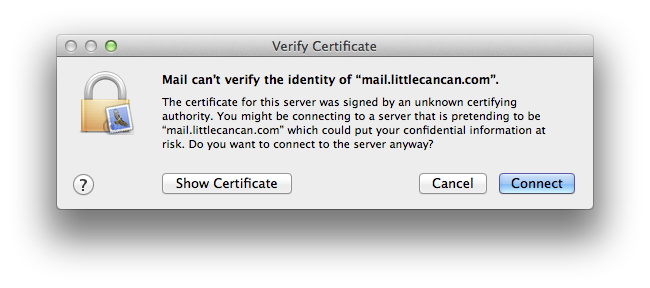
-
5. Enter the "Outgoing Mail Server" information, make sure "Use Authentication" is ticked, then click "Continue"
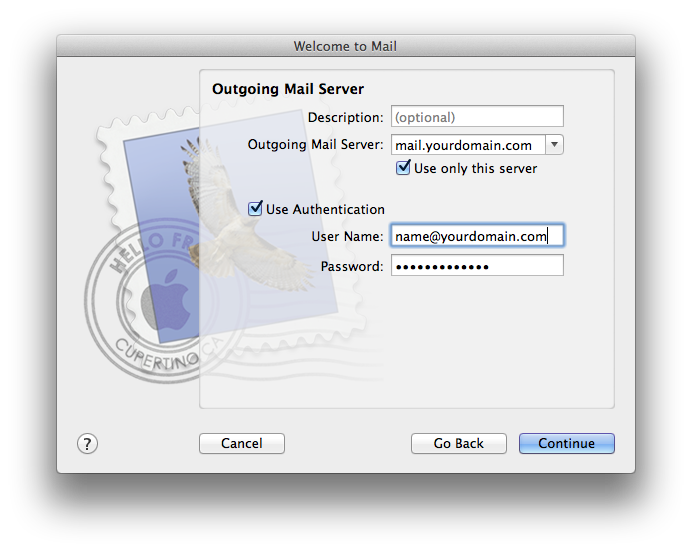
Outgoing Mail Server: mail.yourdomain.com
User Name: Your Full Email Address (eg, alex@yourdomain.com)
Password: Your Email Password -
6. When the window below appear, click "Setup Manually"
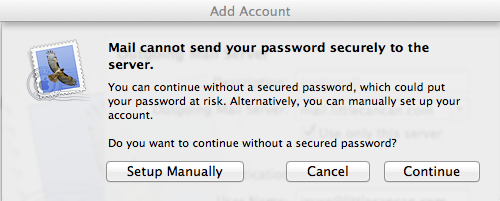
-
7. Make sure Use Secure Sockets Layer (SSL) is Unticked, and choose "Password" for Authentication, then click "Continue"
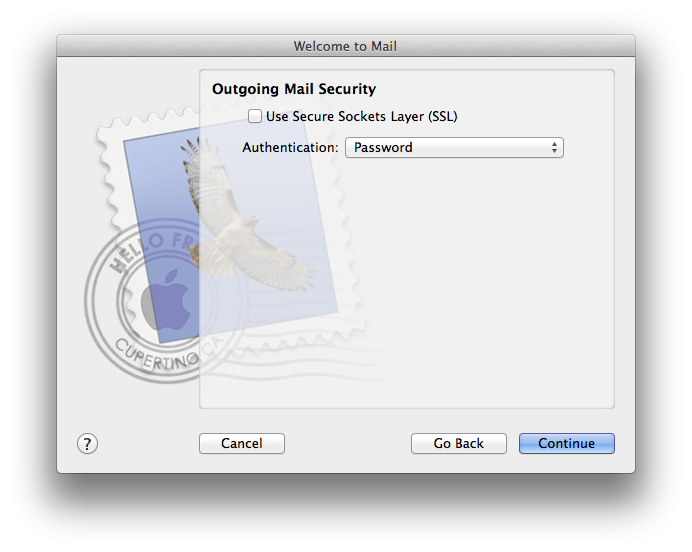
-
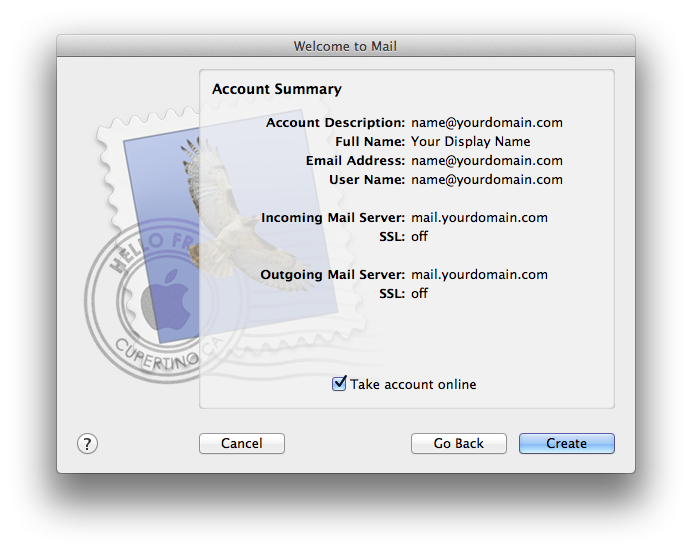
8. An Account Summary window pop up and make sure to Tick the "Take account online", then click "Create"
-
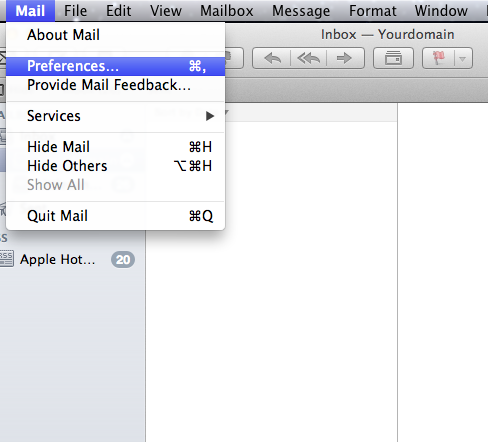
9. Your account is created. Next click on "Mail", "Preferences"
-
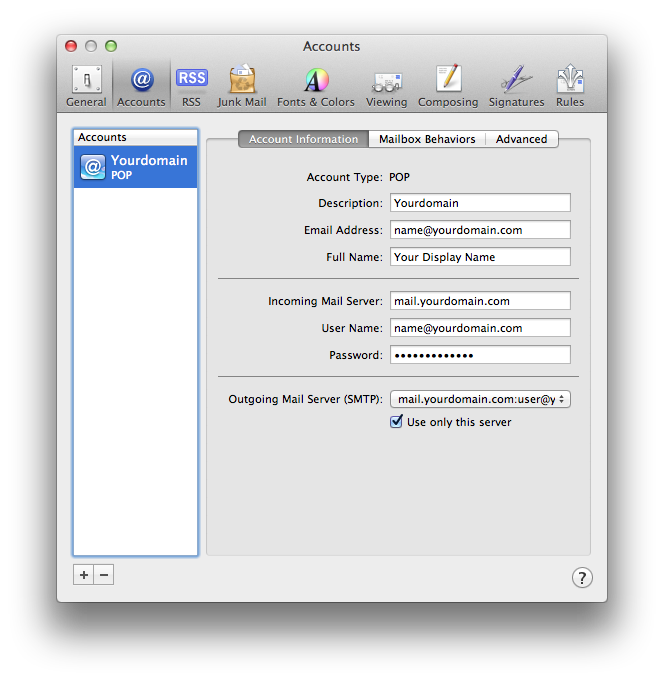
10. The Account Information will appear.
-
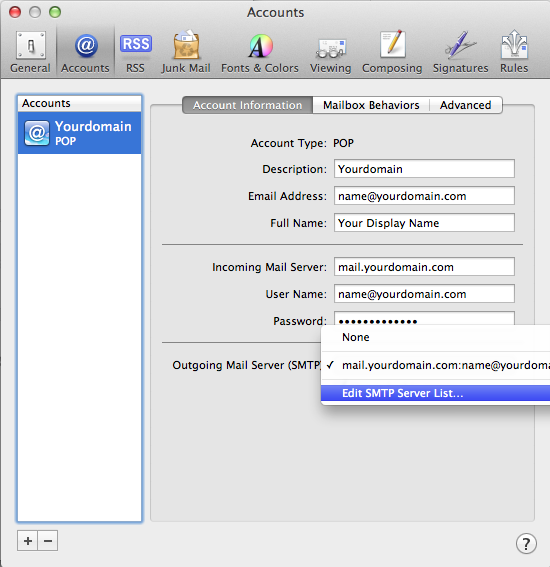
11. Now click on the "Outgoing Mail Server (SMTP)", select "Edit SMTP Server List..."
-
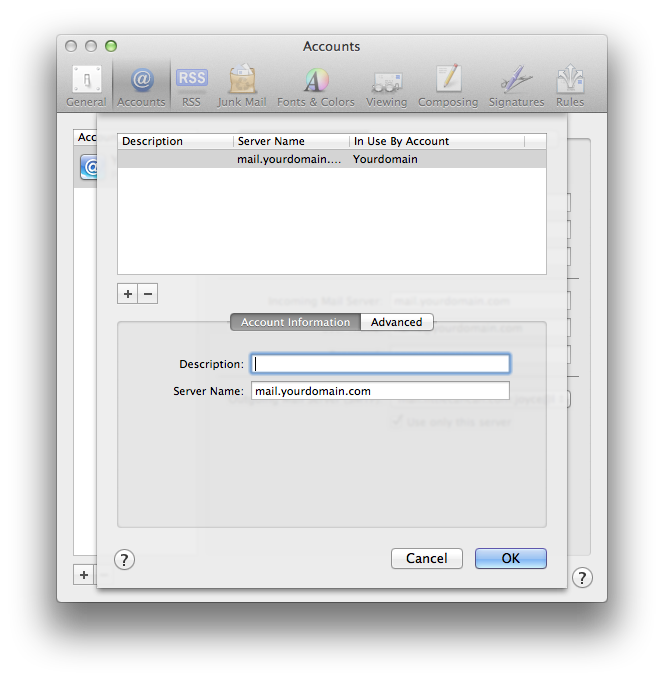
12. The below window will appear.
-
13. Click on the Advanced tab, make sure the option "Use default ports (25, 465, 587)" is chosen and the information entered is correct as below, then click "OK"
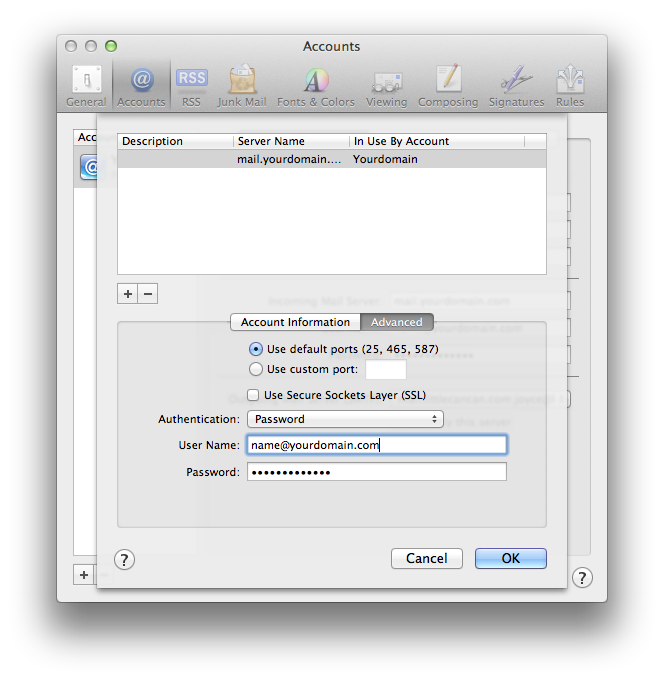
Authentication: Password
User Name: Your Full Email Adddress
Password: Your Email Password -
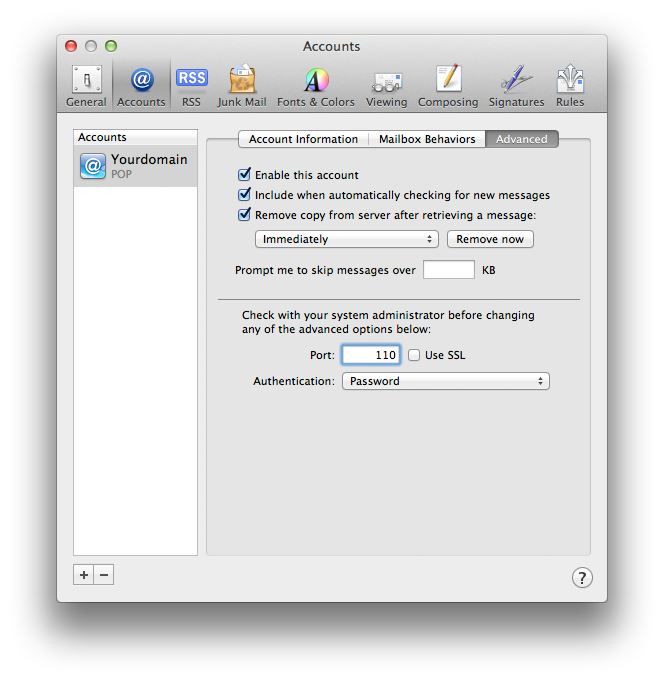
14. Lastly, click on the Advanced tab, tick the option "Remove copy from server after retrieving a message" and choose "Immediately" or at most "after one week" to minimize the risk of overusage of disk space. Change the Port to 110 and untick "Use SSL". Save all changes and now you are ready to use Apple Mail as your email client.
